
[FIXED] Printer Not Connected Issues. Easily
If your printer is not connecting to your computer, don’t worry. You can fix the printer not connected issues easily with the solutions in this article.
Why isn’t my printer connected to my computer? The causes are various. It’s likely that your USB cable is damaged or your printer’s not detected by your computer. Maybe there’s something wrong with your printer driver. Whether you’re getting the printer not connected issue suddenly or it has never worked over the network, you can try the following solutions to fix your problem.
Try these fixes
- Check the printer connection
- Update the printer driver
- Troubleshoot printer issues
- Restart Print Spooler service
Note: before getting started, ensure that your printer’s hardware works properly. If there’s an issue with your printer itself, trying contacting your printer manufacturer.
Fix 1: Check the printer connection
1. Restart your printer
Power off and then power on your printer to restart it. Wait for a while for it to be fully ready.
2. Check the connection issue
If your printer is connected by the USB cable, ensure the cable is not damaged, and it connects firmly and correctly. Also check the USB port and clean the ports in case something inside the port is preventing your USB from connecting.
If your printer is connected via wireless network or Bluetooth, follow the manual delivered with your device to connect your printer to WiFi or Bluetooth properly.
As this varies from manufacturer and printer, for example the operations vary from HP printers to Brother printers, so we won’t cover it here and you should follow the product manual.
3. Check the network connection
As the network issues can also cause your printer not connected, you should also make sure your Internet connection works when you’re using your printer.
Fix 2: Update the printer driver
The missing or outdated printer driver can lead to your printer not connected issue, so you should verify that your printer driver is up to date.
There are two ways to update your printer driver: manually and automatically.
Manually: you can manually download the printer driver from the manufacturer, and install it in your computer. Ensure to download the latest correct version that’s compatible with your Windows system. As this varies from manufacturers and printer models, so we won’t cover it here.
Automatically: if you don’t have time or patience, you can do it automatically with Driver Easy.
Driver Easy will automatically recognize your system and find the correct drivers for it. You don’t need to know exactly what system your computer is running, you don’t need to risk downloading and installing the wrong driver, and you don’t need to worry about making a mistake when installing.
You can update your drivers automatically with either the FREE or the Pro version of Driver Easy. But with the Pro version it takes just 2 clicks (and you get full support and a 30-day money back guarantee):
1) Download and install Driver Easy.
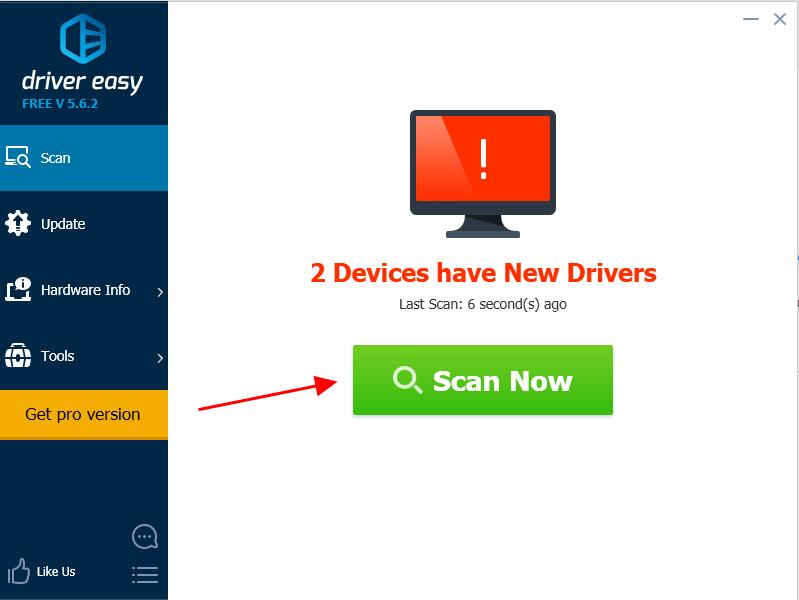
2) Run Driver Easy and click the Scan Now button. Driver Easy will then scan your computer and detect any problem drivers.
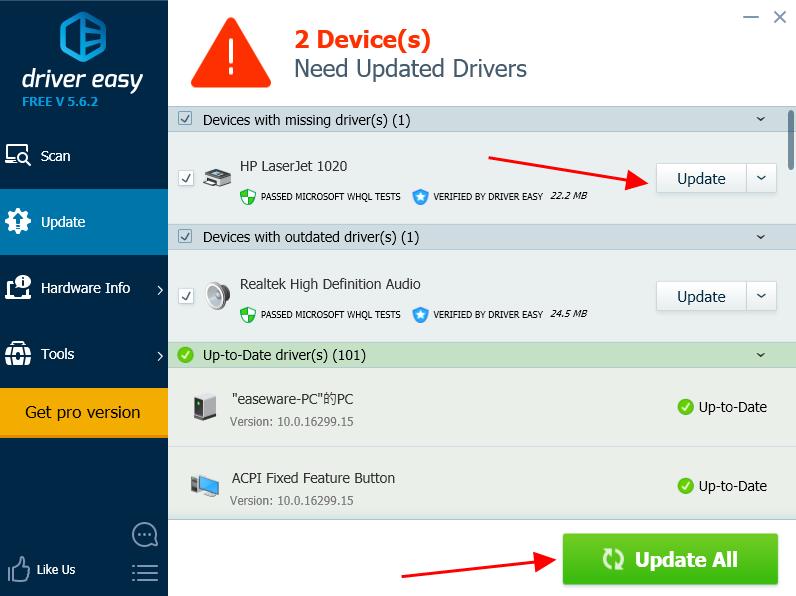
3) Click the Update button next to the flagged printer to automatically download the correct version of their driver (you can do this with the FREE version), then install it in your computer.
Or click Update All to automatically download and install the correct version of all the drivers that are missing or out of date on your system (this requires thePro version – you’ll be prompted to upgrade when you click Update All).
4) Restart your computer to take effect.
Try to use your printer again to see if it’s connecting.
Fix 3: Troubleshoot printer issues
You can also try the troubleshooting tool to diagnose and fix your printer issues. Here’s how to do it:
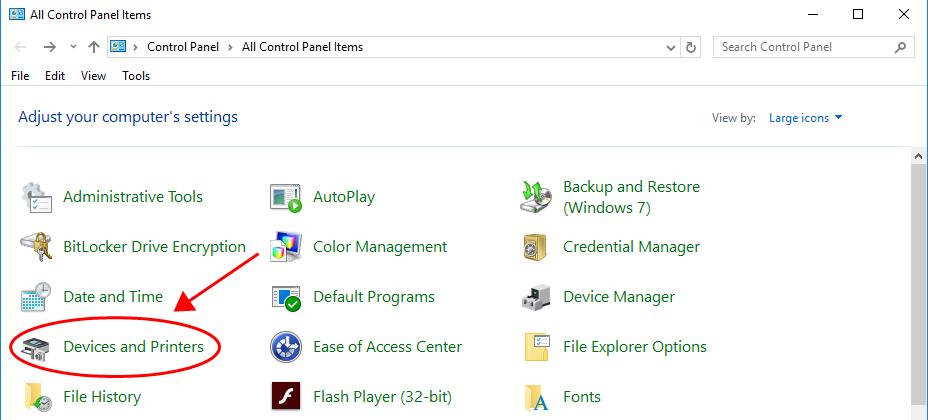
1) Open Control Panel in your computer, and view by large icons or small icons.
2) Click Devices and Printers.
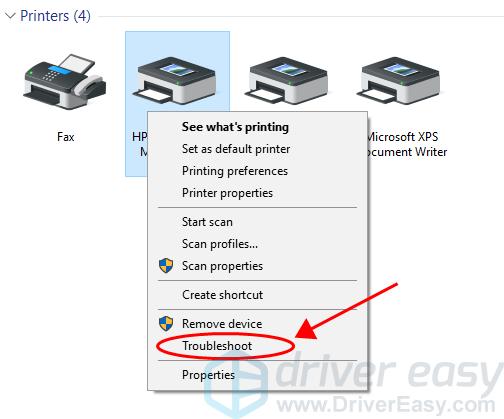
3) Find your printer, right click on your printer (sometimes it may display as Unspecified) and select Troubleshoot.
4) Let your computer troubleshoot the issue and follow the on-screen instructions to fix it.
Fix 4: Restart the Print Spooler Service
The Print Spooler service spools print jobs and handles interactions with the printer. If the service isn’t working, you won’t be able to see your printers and your printers won’t be connected. So you can restart the Print Spooler service to fix the issue.

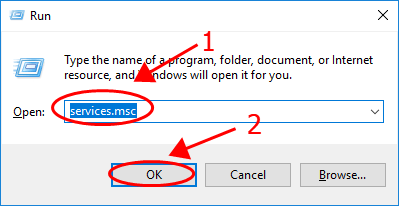
1) On your keyboard, press the Windows logo keyand R at the same time to invoke the Run box.
2) Type services.msc and click OK.
3) Scroll down and find the Print Spooler service.
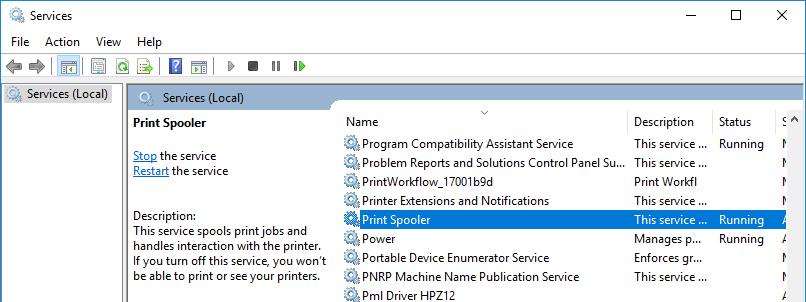
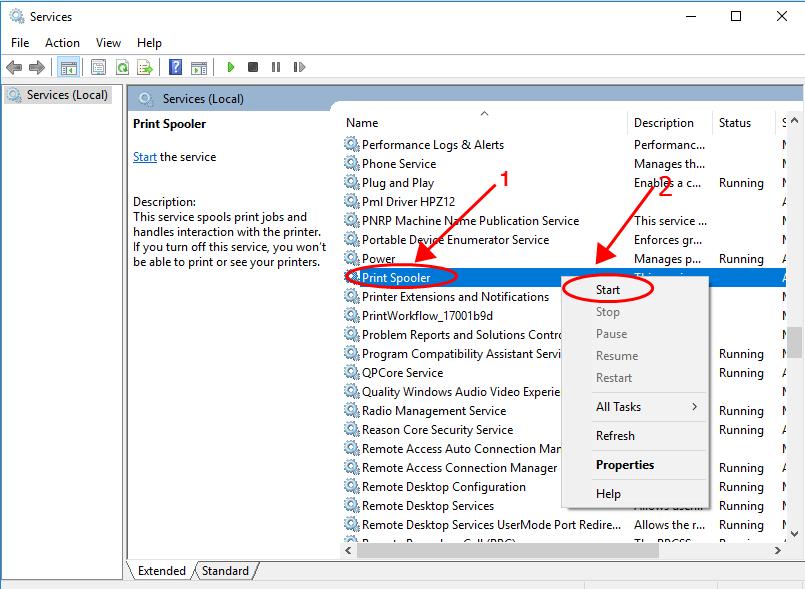
4) If the service is running, right click on the service and select Stop, then right click on the service and click Start to restart the service.
If the service isn’t running properly, right click on the service and click Start to run the service.
5) Restart your computer and try your printer again see if your printer is connected.
That’s it. Hope this post comes in handy and helps resolve your printer not connected issue. If you have any questions, feel free to leave a comment below.


